


This is an easy & simple way for any programmers new to Java or NetBeans IDE.
 Starting this article with a cup of coffee. Coffee is an international drink for developers, coders, programmers. As you are reading this article as a Java programmer, I hope you are able to visualize this picture with “Java” logo.
Let me dive into the content. You might have wondered in your beginner days to coding or in your childhood days in 90’s or early 2000 as how all your favorite desktop softwares like Calculator, MS Paint, Text editor, Notepad, Recycle Bin, Internet Explorer. etc are made.
But now you have learnt to code & you understood how program works and how softwares are created using programming. That’s great and cool.😎

Now that you have created a GUI (Graphical User Interface) application in Java, you enjoy interacting with GUI by running the .java file from your IDE most of the time.
Why not change it to a Java application with a logo and place it in your desktop! That sounds brilliant.

Step 1: First we need .jar file. If you have your jar file already, skip this line. Else please read this: In your NetBeans IDE, select your project from the project files and in the menu bar, click ‘Run’->’Clean and Build project’. Wait till the project complete building. JAR file is created. Let us assume your program name is ColorChanger.java, hence the JAR file’s location is “ChangeColor->dist->ColorChanger.jar”.
To convert your java program to .exe file, a tool I’m using is Launch4j. There are many other tools to package your program such as packr, JSmooth, JexePack..
Step 2: Click here to download Launch4j. Install it.
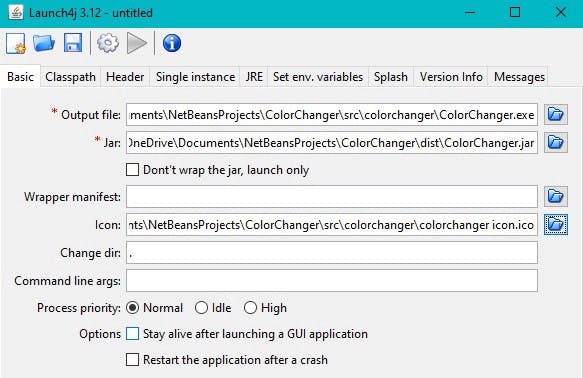
Step 3: Open Launcher4j. In the basic section, for the Output file, select your project location or any new folder, create a file ‘programname.exe’. Here am taking ColorChanger.exe
Step 4: In the jar file text field, click the blue open folder icon in it and locate the .jar file in ‘dist’ folder in your project folder.
 Step 5: To set an icon for you application, .ico format is required. If you have your icon file in other formats like jpg/png/jpeg, convert it to ico format and locate the ico file in ‘icon’ field.
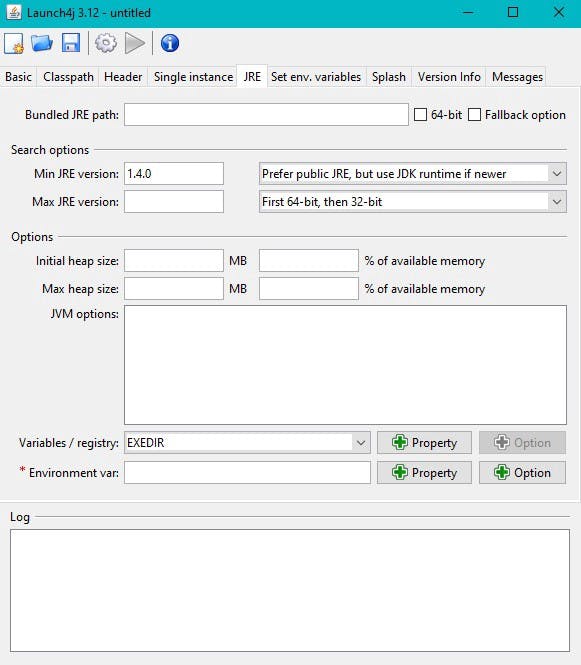
 Step 6: Move to JRE section in Launch4j. Type the minimum jre version in the text field ‘Min JRE version’ as 1.4.0
 Step 7: Finally click the gear icon in the menu bar to build wrapper. A pop-up opens. Type your ‘programname’ in it and click ‘Save’. Ex: Type ‘ColorChanger’ and click ‘Save’. Now exe file creating process is started and status is shown below in Launch4j window. Make sure it displays ‘Successfully created’
In the location you specified, the exe file is now available. Double-click it to open. Now your program is turned to an executable file. We can copy this file and paste in desktop also.
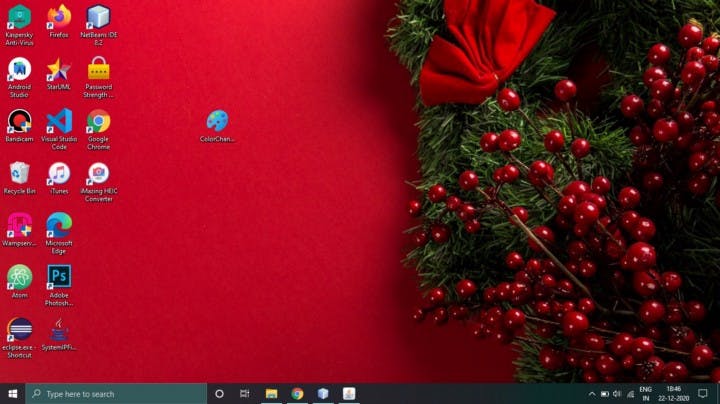
Here is my exe file in desktop with icon. Simple & quick
Happy CODING geeks!
Thanks for reading 👩💻 I hope you made .exe file using this article.